Monday, December 6, 2010

Mission: Space

     When my son decided he wanted a space party for his 4th birthday, I knew my mission was to make him and awesome space shuttle cake.


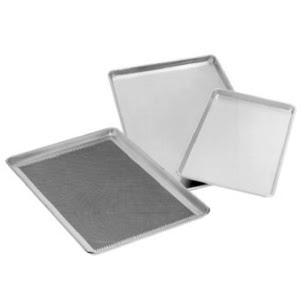
     This was actually a pretty simple cake to construct. After mixing up the batter, I poured it into a jelly roll pan. I’m not sure of the exact size of the pan, but I know it’s a little bigger than my 11x15 sheet pans. The great thing about using sheet pans for making cakes is that the baking time is significantly reduced; it usually takes me about 20-25 minutes. The pans I use for this are found in the restaurant supply section of many Costco stores, they look like big, rimmed cookie sheets. I love these pans and I use them for tons of stuff! They look something like this:
     After I baked and cooled the cake, I cut it into identical rectangles using a template cut out of cardboard. I filled the cake with peanut butter butter cream and mini chocolate chips and then put it in the fridge to chill for a bit. The great thing about making a space shuttle cake is that there’s not much carving involved since it’s pretty rectangular. I contoured the top edges a little bit and carved the nose then crumb coated it all. The cake went back into the fridge to chill for a bit before I put fondant on.

     After I applied the fondant, all I had to do was make some lines on the cake and then use black fondant for windows, accents, etc. I cut out the wings and stabilizer the night before the party and placed them on a cookie sheet line with wax paper. I left them in a cool oven with the light on overnight. (I was surprised at how warm that light can make the oven!) I put these pieces on right before the party. I also used food markers to do some of the accents. I really wish there was some way to make it easier to write on a cake; my handwriting on the side is my least favorite part of this cake!

     I was pleasantly surprised by the final result even though there were some things I wish I had done differently. I just wish I’d gotten a better picture of the cake, but with all the party craziness going on, I guess I’m lucky I managed to get any pictures at all!


Tuesday, November 2, 2010

Guinness!!

My husband's birthday was last month and even though he'd rather have pumpkin pie for his birthday, I like to make a cake or cupcakes for him to take into work. I guess it's sort of like sending cupcakes to school with a kid.  Haha!  :)

A couple years ago, I made this Chocolate Stout Cake for St. Patrick's Day and I though it would be fun to make it into cupcakes this year for his birthday. For some reason guys really seem to like things that have beer in them, are cooked in beer, taste like beer, look like beer, etc. so I was hoping these cupcakes would at least be a hit with the guys in the office.

The day I went shopping for cupcake liners, there were no plain or non-Halloweenish ones to be found so I used some nut cups I had sitting around. If you're planning to use nut cups for making cupcakes, make sure they are not lined with wax.  The wax lined ones are not suitable for baking.  Another option are paper souffle cups. One nice thing about using these is that you can just line them up on a baking sheet and put them in the oven; it enables you to bake more cupcakes at once.
It can be difficult to get the paper off to eat the cupcake, so I cut a small slit in each cup before filling. If you look closely at the pitcure below, you can see the small cut.

Since this was only the second time I had baked in these cups, I was worried they would bake up too high and spill over. I filled them about halfway and they baked up just right. I like my cupcakes to bake up with a flat top, it makes for easier decoration.

This recipe makes a huge amount of batter since it is for a 3 layer cake. I baked 22 regular cupcakes (I know it's a strange number, but there were only 22 cups in my 24 pack...), 24 mini cupcakes, 6 little pumpkin shaped cakes and an 8-inch cake. Thank goodness this cake is good, we ate it for about a week!  :)
Since I was only sending the cupcakes and mini cupcakes into the office, I concentrated my decoration efforts on those and used two frosting techniques. When the ganache was still warm, I dipped the tops of the mini cupcakes in and then stuck a large pumpkin sprinkle on top.
For the regular size cupcakes, I went with the traditional swirl and then topped them with sprinkles.  I found sprinkles that just happened to be in the colors of my husband's alma mater. Go Dawgs!!! 

By the way, they were a huge hit, not only at the office but also with all the friends we were able to share with!

Sunday, August 15, 2010

Home Run!!!!

Lately I've been feeling the need to bake....A LOT!!!  So, when my husband's office announced they were having a softball game followed by a potluck, I quickly got to work planning what to make. I like to take cupcakes to potlucks because they are easier to serve than cake, so I knew I'd be making some sort of yummy cupcake.  After checking out some ideas on CakeCentral, I knew just what I wanted to do....chocolate cupcakes with buttercream "grass" topped with a fondant softball. 

I've been watching a lot of cake shows and cupcake shows and I've been intrigued by their use of fillings in cupcakes.  I'd never tried before so I figured I'd give it a shot. My original thought was to fill them with whipped ganache but I was too impatient to cool and whip the ganache so I just went with lukewarm ooey-gooey ganache instead. I've seen many people using apple corers to create a hole for the filling; I didn't have one of those so I used a bismarck tip. I think the bismarck tip worked extremely well for the filling I was using, it wouldn't work so well if you wanted to use a chunky filling. Using the bismarck tip, I was able to insert the ganache into three separate holes rather than one larger hole; this ensured there was ganache throughout.

These cupcakes were AMAZING; it was like having a truffle inside your cupcake.  I'm definitely looking forward to working with more fillings for cupcakes.

The finished product:


I've mentioned a few cake shows in my posts, here are a few I like:

Did I forget any?

Also, I just heard that Bravo is going to take Top Chef to another level with Top Chef: Just Desserts.  I don't know how much cake will be involved, but I'm really excited for this show!

Friday, August 6, 2010

Vow Renewal

Some good friends of ours recently renewed their vows and asked me to make the cake for their reception/going away party.  Other than telling me which flavors they wanted and what colors the decorations were, they left the design up to me.  Since they were getting ready to leave Maui, I decided a tropical themed cake was a must. I headed to my favorite website, CakeCentral, to look for some design inspiration. I took some ideas from a few different cakes and came up with an idea of what I wanted; visions of plumeria, bamboo and teal/aqua filled my mind. 

After the baking and trimming were done, I filled the cakes:

Then it was time to start frosting.  I forgot to use my cake icer tip, so icing the sides was more difficult than it needed to be, but I still got it all covered.

Notice how I made sure the frosting went all the way to the edge of the cake board, doing this gives you a guide when you use a spatula or other tool to smooth the sides. The next picture shows one of my favorite icing tools, the Wilton Baker's Blade, this blade is great for smoothing the sides of a cake.

Unfortunately, the odds were stacked against me when I started trying to smooth the cake. I had forgotten that the sun beats on my kitchen wall all morning making it super hot and that the AC doesn't work all that well in there.  I iced and scraped and smoothed and re-iced and re-scraped and re-smoothed over and over for about an hour before I finally decided this cake was never going to be smooth.  I decided I'd go for the textured look and just say it was supposed to "represent the ocean"! :)  You can totally do that with art, right?  Haha!

I had some other tricks up my sleeve, so I wasn't too worried about the texture.  (My husband would probably disagree since I asked him about the texture until the very minute we actually got to the party!) Remember when I said that my visions included plumeria and bamboo?  Well, these were all handmade.  I sculpted plumeria out of gum paste and bamboo out of fondant.

This was my first attempt at the gum paste plumeria and I learned some tricks in the process, but overall they turned out well.


Even though it wasn't exactly what I had originally pictured, I think the cake turned out nicely; everyone at the party loved it and there were only a few pieces left when the night was over!

Sunday, May 30, 2010

Birthday in Paradise

Last week I received a call from one of my husband's colleagues asking if I would do a cake for his wife's birthday.  I love getting the opportunity to make someone's birthday extra special, so I of course said yes!  Not to mention, the birthday girl is a dear friend of mine and I know she LOVES my cake!  :)

Other than the fact that the cake had to have lots of icing (the birthday girl's favorite part of the cake), I was pretty much given free reign over the design.  I've never been very good at the typical birthday buttercream roses, so I turned to my favorite cake website, CakeCentral, for ideas.  I quickly decided that I wanted the cake to have a tropical feel since this is the last birthday that my friend will be celebrating in our beautiful island paradise before she and her family move back to the mainland!

The CakeCentral photo galleries gave me a ton of inspiration, but given the fact that we have limited access to cake supplies here on the island and that the cake only needed to be big enough for her family of five, I had to scale back some of the grand ideas I had.  Luckily, I stumbled upon these instructions on making tropical flowers using buttercream.  Making these flowers was super simple and the results are great! 

I keep forgetting to adjust my butter and crisco amounts to compensate for the crazy humidity here in the islands, so my icing was a little softer than I would have liked.  I think a stiffer icing would have made the flowers look even better.  Also, at first I was little unsure about the color combination, but it grew on me after a while.  I think it gave it just the right amount of "tropical flair."

What do you think?


Here's a closer look at the flower:

I spoke with my friend today and she loved the cake; she's down the last piece or so of cake and she's rationing it. Haha!  I'm glad I was able to help her celebrate her last tropical birthday!

Thursday, May 20, 2010

Tea Pot

For the last few months, I've been planning an amazing birthday tea party for my baby girl. Let's be honest, she's not really a baby anymore, she just turned 5. To me she will always be my baby girl! :)

Part of the tea party planning was figuring out what kind of cake to make. I had grand plans of a topsy-turvy concoction with a tea cup sitting off-kilter on the top complete with tea splashing over the side of the cup. That all changed when I asked the birthday girl what she wanted and she said two words: tea pot. My grand plan flew out the window and I got to work figuring out how to construct the cake she requested.

After browsing the galleries at CakeCentral.com, I came up with my design. I baked a ten-inch round cake and covered it with buttercream. On top of this, I placed a fondant "tablecloth" and on top of that a tea pot made from cake.

Rather than trying to sculpt a tea pot from round cakes, I baked up some cake in bowls. My bowls are stoneware so they are oven safe. Before putting bowls in the oven, check to make sure they are oven safe. Here is a picture of the bowl I used:
I liberally applied some homemade cake release solution to the bowls and inserted a well-greased rose-nail upside down in the bowl before pouring in the batter. I let the caked bake for about 45 minutes before checking on them and to my surprise, they were almost done.

When the cakes were cool, I put them together with a thin layer of buttercream in the middle. After applying a thin layer of buttercream and chilling the cakes for a while, it was time for the fondant. I had some issues with the fondant, mostly because of the shape of the tea pot. Every time I would try and get the fondant to come back down to the bottom of the pot, it would start to tear! Either that or my fingernails would poke a big hole in it! (Note to self: Remember to cut fingernails super short before working with fondant!) I finally got the fondant to cover most of the cake successfully and used a few tricks to cover up the mistakes! :) Here's a picture of the cake:


The purple band around the bottom covers up some mistakes. The spout, handle, and lid are all made from gumpaste. Handle and spout were free-handed and have floral wire inside to connect them to the cake.  The lid was molded from the inside of another lid I have.

Friday, April 30, 2010

Another Wedding Cake

I just got back from a trip to California where I made the cake for my brother-in-law's wedding.  I love being able to give my family members a wedding cake as their wedding gift; it saves them a ton of money and gives me a chance to perfect my craft!  :)

The bride gave me her vision for the cake fairly early on and I got to work planning sizes and my plan of attack!  Whenever I travel and do a cake I have to make sure I make some sort of baking and decoration schedule ahead of time so I know I have plenty of time.  Here's the picture she sent me as inspiration:
When she mentioned that part of what she liked about this cake was how imperfect it was, I was both relieved and terrified!  I was relieved that she wasn't expecting me to have perfect corners, that's a pretty hard task and one I'm not very skilled at yet.  At the same time, I was terrified because I am a perfectionist and it's not in my nature to put out a product that doesn't look as perfect as I can get it! 

Once we figured out an approximate number of guests, I figured out what sizes pans I would be using (12 in, 10 in, 8 in and 6in) and started to figure out the quantity of ingredients I would need.  I also started to stress out more and more about how to make an imperfect cake!!!!  Haha! I started looking at some cake pictures on Cake Central and realized that giving the sides some texture would look pretty cool and it would be an easier way for me to make it look "imperfect".....not to mention it would take a lot less time to frost the sides! So, I sent the bride and e-mail with a couple sample pictures and she decided she liked the texture too (when I got that e-mail I'm pretty sure I let out a sigh of relief and a big "WOO-HOO!!!" as well!)

The textured sides were a breeze; it only took me about an hour to frost the WHOLE cake!!!  If I'd been going for a smooth texture it would have taken me at least twice as long.  Here's a picture after I got it assembled:
Just sitting there in my mom's kitchen I thought it resembled the Matterhorn at Disneyland....hahahaha!!!

Once I got it to the venue and the flowers got put on it, the look totally changed.  It totally fit in with the theme of the wedding and the feel of the venue.  My dad said the sides of it sort of looked like the walls behind it.  I wasn't sure how I was going to like this cake because I am not used to the texture and the askew stacking method, but in the end I really liked how it turned out. Here's a picture of the final result:


Two more quick things:
- The cake had two flavors: white cake with lemon buttercream and chocolate cake with German chocolate filling
- I discovered a new favorite thing: The cake icer tip - This thing made icing a breeze!  I used it spread icing all over the cake and then all I had to do was smooth the sides a little.  I forgot to take a picture of the process, but I'll try and remember to take some when I make my next cake!

Wednesday, April 14, 2010

Quick Pics

On my last post, I mentioned that I had forgotten to take pictures of the cakes I did for the Air Force promotion party.  Some of my readers were actually at the party and one of them sent me some pictures she had taken!  Thanks, Corrie!

I love everything about these cakes.....except the handwriting!!  Writing on cakes is the thing I dislike the most, I feel like I need to spend hours just perfecting my cake handwriting which, by the way, is completely different than regular handwriting!  It doesn't help that I still haven't figured out all the tricks to working in such humid conditions!  :)

Without further ado, here are the pictures:

These cakes are completely iced in buttercream and the leaves are made from a fondant/gumpaste mix.  I rolled out the fondant and put a cut-out of the leaf over it and cut it out with an exact-o knife.  I then used the knife to make the detail lines, which are the same detail lines found on the hard rank a Lt. Col. wears on their uniform. Then I dusted the leaves with shimmer powder to give them the metallic look.  After the fondant was dry, I just picked them up and laid them on the cake.  Simple fondant accents can really make a cake "pop."

Hope you enjoy!

Thanks again Corrie!

Friday, April 9, 2010

Friday Favorite: Website

As I've mentioned before, I learned the basics of cake decorating at some Wilton courses I attended.  At the time I was taking the classes, they offered 4 different sessions I took them all back-to-back.  I'm not sure if they offer any more classes now, but I can think of a few that would be helpful including more fondant techniques and gumpaste flowers.  I wanted to go above and beyond what I had learned in those classes so I began seeking out more resources online.  While seeking out these resources, I stumbled across what I believe to be the best cake baking/decorating community available online:


Touted as "the world's largest social network for cake decorators," this website has photo galleries, recipes, how-to articles, forums and recently launched a magazine.  I have turned to the photo galleries many times when I was in need of inspiration for a cake and my "go-to" spot for recipes is found there as well; I've even tried some new techniques based on their how-to articles. My favorite part of this website, however, is the forum section.  With areas including "how do I?," "cake disasters," "cupcakes" and "cookies", you are sure to find the answer to almost any question you have.  The forum members are very helpful and have answered many of my questions.  I also understand that quite a few well-known cake decorators, including Buddy Valastro of Cake Boss and Carlo's Bakery, are members of this site. 

Next time you're in need of some advice or inspiration, head over to Cake Central for some help.  If you're just bored and looking for something to do you could browse the galleries to see some awesome cakes, check out the "cake disasters" section of the forum for some real life disaster stories, or just browse the forums for some interesting stories or ideas; I really like to read the posts about the crazy customers people sometimes encounter.  Thank goodness this is just a hobby for now and it's mainly just for friends and family, most of you aren't too crazy!  :)

Wednesday, April 7, 2010

Uh....Thanks for the help.....I think

In honor of Easter and the Easter Bunny, I had the kids help me make a carrot cake.  I found the recipe here.  This cake was super easy to make and super yummy!!  I followed the advice and baked it in a sheet pan; it makes it really easy to throw together and frost a simple cake and it bakes up in only 25 minutes!  I like being able to just throw something together if it's just for my family.  Also, since my food processor broke a few months ago and I "needed" one to grate the carrots, I got this as an early birthday present!

The kids weren't really into the baking part of if, but were excited when I let them decorate the cake with Starburst jelly beans (the best jelly beans EVER) and bunny marshmallows. 
They were both really into decorating!


The final result

In other news, I did bake and decorate a couple cakes for an Air Force promotion party last week.  They turned out well, but I forgot to take any pictures of them.  I'm bummed because I made some gumpaste/fondant ranks and brushed them with silver shimmer dust; they looked really nice on the cakes.  I'll have to see what I can do about finding some pictures of them!  Baking them was a bit of a disaster....the chocolate cakes kept sticking to the pan!!!  In the end I had to scrape the stuff of the pan and piece the cake together a bit before I could frost it.  It's a good thing that frosting can cover all that stuff!

**Baking tip of the day**
When making large cakes, such as a 12x18, you can bake each layer in a sheet pan.  It only takes each layer about 25 minutes to cook and then you don't have to worry about torting (I'm pretty sure I just spelled that wrong!) the cake since it's already done for you.

Friday, March 26, 2010

Friday Favorites

A while back I mentioned working on a post of my favorite things but between being a mom, a wife, a Master’s student and everything else, I just haven’t had the time. With my second Master’s class winding down and "spring break" in sight, I’ve finally found the time to compile a list. I’m sure it won’t be a complete list because I’ll probably think of a million other things as soon as I hit submit, but here's Take I of my list:
  • Fat Daddio's Cake Pans - According to their website, they are 16 gauge hard 3003 aluminum
    and anondized...don't ask me what that means, I have no idea!!  What I do know is that they are durable and help my cakes cook up beautifully.  These pans come in a variety of shapes and sizes.  Another great thing about these pans is that they have straight sides.  Straight sides might not seem like a big deal, but when it comes to stacking cakes it makes a big difference; if your pans do not have straight sides the sides of the cake will flare out slightly from top to bottom.  If your cake sides flare out it is much more difficult to get your sides to look nice and straight.  One quick way to check if your pans have straight sides is to try stacking them inside each other (i.e., an 8in round inside another 8in round); if one fits inside the other your pans do not have straight sides.
  • Satin Ice Rolled Fondant - This is not the fondant that everyone thinks of when they think of nasty tasting fondant, it's actually pretty tasty.  It's great to work with and makes even basic cakes look fabulous.  It comes in a variety of colors and you can even buy a dark chocolate flavor! I also like their gumpaste.
  • Fondarific Fondant - This stuff tastes GREAT!  It comes in a huge variety of flavors including grape, strawberry, orange and my husband's favorite, Coffee Mocha!  I haven't worked with it much, but I would recommend it based on taste alone.
  • Bakery Craft's Single Plate Separator System - This is THE way to stack tiered cakes.  The system consists of plastic plates and legs that lock into the plates.  As you stack your cake, you push the plates (with legs attached) into the lower tiers, the legs support the weight and since they lock in place, they don't allow the plate to move.  I use this system in all my tiered cakes and feel completely comfortable carrying and transporting cakes stacked with this system.
  • Wilton Bake Even Strips - These nifty little strips help to keep the sides of your cake from becoming the "crust" of your cake.  After you soak them in cold water, you wrap them around the pan while your cake cooks.  They help keep the sides of the cake from cooking too fast and becoming dry.
  • Wilton Disposable Decorating Bags - Getting all the grease and color out of regular decorating bags is a pain; I have yet to figure out a good way to do this. Any ideas?  In the meantime, I really like these disposable bags, when I'm done I just cut off the end so I can get my tip and coupler off and throw the rest away....super easy!!
  • Wilton Decorating Tips - There may be better tips out there, but these have worked great for my needs; I have yet to have any problems with them.  Another plus is that they are available at your nearest Wal-Mart or craft store, with most other brands you have to buy them at a cake supply store.
This list pretty much covers the basic supplies.  As I continue my cake decorating journey, I'm sure I'll be posting on some more of my favorite things.  I'm always up for trying new tools, so if any of you cake decorating suppliers out there are reading this, I'd be more than happy to sample and review some of your products!  ;) 

***Most, if not all, of the products on this page can also be purchased at http://www.globalsugarart.com/. And no, they aren't paying me to put their name out there.....as a matter of fact, I'm pretty sure they don't even know I exist!***

    Friday, March 12, 2010

    German Chocolate: Take II

    So, this week's adventure was to try the German chocolate stuff again.  By the way, does anyone know what you'd call that stuff??  Is it frosting?  Is it filling?  What is it?

    In the true sense, I didn't actually make GERMAN chocolate cake.  I just used my standard recipe for chocolate cake and then picked a fairly standard, simple recipe for the frosting.  If, like me, you were wondering if Germany had some secret crop of coconuts, check out this site for the story behind the cake.

    Anyway, this time around, I made sure that I followed the directions closely....haha!

    The egg yolks, sugar, butter and evaporated milk went into the pan first.


    Just like last time, I cooked them until the butter was all melted and everything was smooth.


    Unlike last time, I let the mixture come to a boil and thicken.  The thickening step was what I missed last time, and let me tell you, it made a HUGE difference!


    These guys were waiting to hop in the pot, too.


    Once I mixed it all together it looked like this, which already looks much more spreadable than my last attempt.


    I let it set for a while longer to make sure it wasn't going to run and then I set out to frost some mini cupcakes for an Air Force vs. Coast Guard softball game and BBQ we're going to today. Go Air Force, Beat Coast Guard!!!!  Doesn't quite had the same ring as Go Army, Beat Navy does it?


    I had a little stuff left over so I made a mini cake for a BBQ we're having with friends this weekend.


    It looks much better this time, let's hope they taste good, too!

    And in case you were wondering, here's the recipe I used for the frosting....as for the cake recipe, well a girl's gotta have some secrets!  :)

    German Chocolate Icing:

    1 cup white sugar

    1 cup evaporated milk
    1/2 cup butter
    3 egg yolks, beaten
    1 1/3 cups flaked coconut
    1 cup chopped pecans
    1 teaspoon vanilla extract

     - Combine sugar, evaporated milk, butter and egg yolks in saucepan. 
     - Cook over medium heat, stirring constantly, until mixture begins to boil and thicken. 
     - Remove from heat. 
     - Stir in coconut, pecans and vanilla.
     - Let cool until spreadable.
     - Frost and enjoy.

    Happy Friday!  Hope you have a GREAT weekend!

    Monday, March 1, 2010

    Read TWICE, cook once....

    Do you ever have one of those days where you have trouble focusing?  You have great plans to get stuff done; nothing seems to go as you planned.  I had one of those days yesterday!

    I'm making the cake for my brother-in-law's wedding in April and they've requested some things I've never made before, one of them being German chocolate filling.  My plan was to make a batch of German chocolate filling....you know, the stuff with the pecans and coconut....and put it on some chocolate cupcakes for my husband to take into work. That didn't quite work out.

    I went online to Cake Central, printed up a recipe, read through it and got to work.  I got out all the ingredients, mixed the butter, sugar, evaporated milk and egg yolks on the stove until the butter had all melted, then I dumped in the coconut, pecans and vanilla.

    Then I mixed it all together.


    It looked a little gross, but I don't see how that mixture wouldn't look gross!  :)

    The recipe said to let it cool until it was spreadable, so I let it set on the counter for a couple hours.  I kept checking it and it wasn't getting any thicker, so I transferred it to a bowl and stuck it in the fridge.  It sat there for a few more hours and still wasn't much thicker.  It was sort of like a sugary coconut-pecan soup!


    I'm pretty sure that's not considered "spreadable", nor would it be a good filling for a tiered cake!  I thought I might be able to get away with getting rid of some of the liquid and putting the thicker part on top of the cupcakes. 


    It didn't exactly work; they turned into ooey, gooey, sticky messes!  I still couldn't figure out what went wrong, so while I sent my husband to the trash can with these beauties, I looked over the recipe again.  It was then I realized that I'd done wrong.....

    The recipe said to heat the butter, sugar, evaporated milk, and egg yolks over a low heat until THICKENED....somehow I missed that very important part.  In my head, I'd read to heat it until thin, so right after the butter melted I took it off the heat and mixed in the other ingredients.  This stuff never stood a chance of becoming spreadable!!!!  On the bright side, I came to the conclusion that I did, indeed, have the right ingredients and a good recipe, it was just bad execution.

    The moral of this story:  ALWAYS, ALWAYS, ALWAYS read the recipe thoroughly BEFORE starting the cooking process!

    Stay tuned for my next post: German Chocolate Take II

    Thursday, February 25, 2010

    Two firsts.....

    When my cousin got engaged last New Year's, it was quickly decided that I would make the wedding cake as a gift to the happy couple!  :)  The only problem.....I'd never made a cake that big before.....and I definitely had never made a wedding cake before!!!!

    Once we figured out an approximate number of guests and the color scheme, I quickly got to work sketching out some ideas.  Here's what I came up with:
    The cake tiers would be 12", 10", 8", and 6".  It would serve approximately 100-125 people depending on which chart you're using when figuring that out. It would be covered in Satin Ice fondant and the accents would be a mixture of Satin Ice Vanilla and Satin Ice Dark Chocolate.

    A few months before the wedding, when I knew I'd have some extra visitors at my house to help eat some cake, I got to work making the practice cake.  There was NO WAY I was going to make this cake without having some practice under my belt.  And it's a good thing I did because this is how it turned out:

    (click on the picture for a closer look to get the full picture)

    Not the ugliest cake you've ever seen, but definitely not what a bride thinks of when they picture their wedding cake!  I was afraid that if I put this on a cake table at the wedding, someone would turn me into Cake Wrecks! :)

    I definitely learned a lot from my practice.  I realized just how important 4" tiers are when you are making a stacked cake, how important it is to make sure you center the plates under the tiers just right, that a 12" cake board under a 12" cake looks a little off, and just how hard it can be to work with fondant in August in Maui! I also realized how important it is to use a fondant/gumpaste mixture when making bows; you can roll that mixture much thinner making the bow MUCH lighter and quicker to dry!! The thing that bugged me the most was the cardboard cake boards showing and the gaps between the layers. 

    Over the next few months, I had a chance to practice some more on some different cakes.  I taught myself a few new tricks, gained some more confidence and was able to produce a beautiful cake for my cousin's wedding and I did all while also being Maid of Honor, mother of the Flower Girl and Ring Bearer, and helping to do a lot of the planning and coordinating!  This is the final result:
                                                   
    I'm very proud of this cake!

    This cake is also in the background of my picture on the right!

    So, first wedding cake....wondering what the other first is?????


    I'll tell ya......


    My first Groom's cake!!!!  My cousin's husband is from Texas and a big Longhorns fan (Hook 'Em Horns!!!), so we planned a surprise cake to serve at the rehearsal dinner.  I did a little research on Cake Central, borrowed some ideas, and this is what I came up with:
     
    This cake was harder than it looks!  I cut out all the shapes using an Exact-o knife!  No cookie cutters on this one!  The groom really liked this cake and was totally surprised.  A bunch of his family and friends had flown in from Texas and they really like it also.

    I'm trying to get some stuff together to do a post of my favorite things; there might even be some Wilton items on the list!  haha! Hopefully I can pull that together in the next couple weeks or so!

    If you're interested in serving charts for cakes, here are a few to check out:

    Thursday, February 18, 2010

    Another blast from the past

    **Disclaimer** - I'm sure it sounds like I absolutely HATE Wilton and their products, so let me clarify.  Wilton classes are a GREAT way to learn some of the basics of cake decorating.  I believe, however, that some of their methods are a bit outdated.  I also have a love/hate relationship with their products.  Though others may not agree, I think most of their basic products are wonderful.  I have many of them: spatulas, rolling pins, fondant cutters, etc.  On the other hand, some of the products are not so great....the prime example is their fondant!  That stuff is NASTY!!!!  And don't get me started on those lacy looking cake boards.  :) Ok....got that off my chest, just didn't want you to think I was completely against Wilton and their products.

    Ahh....another Wilton finale cake.  I know their intent is to bring everything you've learned together in the course into one gorgeous cake, I'm just not sure that's what actually happens.  Let's take course 2 as an example.  Here are the things covered in Wilton Course 2: Flowers and Borders:
     - Royal Icing Flowers
          - rosebuds
          - daisies
          - daffodils
          - mums
          - and more
     - Borders
          - reverse shell
          - rosettes
          - rope
     - Basketweave
          - does anyone really use this anymore?  Seriously?  Do they?
     - Colorflow
          - essentially its royal icing used to make an outline and really thin royal icing poured into the dried outline

    Most of these are great techniques to learn, others are not.  I'm not sure how many people use royal icing flowers anymore.  It seems that sugarpaste/gumpaste flowers are more popular now-a-days.  Borders are a great thing to learn, it's nice to know how to do more than one border.  As far as basketweave, I'm seriously curious if this is still used, it seems pretty outdated to me.  The colorflow technique is especially great when it comes to icing sugar cookies, but as far as accents for cake, it seems fondant and gumpaste are more popular.  Not to mention, you can get them same effect using thick royal icing as an outline and a thinner royal icing for filling it in...no need to actually buy the colorflow powder.

    Ok.....so, you learn all those things in Course 2 and you're supposed to bring them all together for your finale cake.  That's a whole lot of crap to put on one cake.  Oh, and I did I mention then finally cake is baked in the oval pans supplied in your course kit?  I'm not sure why they want you to make an oval cake....maybe it's so they can charge more for the kit?  Who knows? 

    Ok, enough ranting there.....

    Anyway, when you take all those techniques and throw then onto one cake, the result is a super-sugary, over-flowery, kinda-cheesy, oval cake.  It looks a little something like this:

    My Course 2 finale cake - circa January 2008

    Wednesday, February 10, 2010

    Engagement Cake

    My most recent cake was for an engagement party.  It was for one of the men that work with my husband.  They asked a couple months ago if I would do something for the party and I said I'd love to.  Here's what I was given as inspiration:
    Centerpieces
    Guest Book

    Right away I knew what I wanted to do for the cake; two tiers covered in fondant with the black floral design.  I just had to figure out how I wanted to get the floral design on the cake. 

    I looked into ordering some supplies from the mainland, but decided against it because the shipping was OUTRAGEOUS!!!!  Seriously....we're talking $42 to ship $25 worth of product!  The only places I can get cake supplies on the island are Wal-Mart and Ben Franklin and they only carry some Wilton products, so I had to figure out how to use what I had.  Between this post and my last couple posts, have you figured out yet that I'm not a HUGE fan of some of Wilton's products?  Ok, enough ranting....back to the cake!  I love the black and white color scheme, but as anyone who has ever worked with food coloring knows, it's super hard to turn white into black.  I briefly considered painting the design on the fondant with black food coloring, but decided against because I was not sure how it would stand up in the humidity outside.  I was checking on my fondant supply when I came across my stash of Satin Ice Dark Chocolate fondant.  I took it out and realized that it was so dark I could pass it off as black.  I quickly got to work with some cookie cutters and pizza cutter and here's what I came up with:


    What do you think? 

    I think I've come a LONG way since October 2007!  This is probably one of my favorite cakes I've done.

    Monday, February 8, 2010

    Why?

    I'm sure you're all wondering why I started this cake decorating nonsense...ok, maybe you're not, but I'll tell you anyway.  I have two reasons......the two cute kiddos in the pictures below!!  :) 

    Aren't they the cutest?

    I wanted to be the kind of mom who made the cakes for my kids' birthdays.  And I didn't want to settle for a Betty Crocker cake with some Betty Crocker frosting slapped on top.  No offense to the Betty Crocker, Duncan Hines, Pilsbury, etc. moms of the world. 

    When my daughter turned 1 I was just pregnant with my son....that should be read that I was nauseous and tired!  :)  That year Sam's Club cupcakes won out, they were easy and I could easily get colors that matched the decor.  For her second birthday I was determined to make something, so I settled on cupcakes.  I found out that they weren't quite as easy as they looked; they weren't quite as tasty as they looked either.  (Side note:  The buttercream recipe that Wilton provides is super sweet and doesn't actually contain any butter.  Perhaps they should call it Crisco cream?) I also discovered that blue frosting is a mess!  Who wants to walk around with blue teeth all day?

    Here's what I came up with....real original, I know :)

    My son's birthday is in November, so in October I decided I'd start taking the Wilton classes at my local Michael's craft store.  I should be able to learn it all in a month, right?  haha!  I wanted to at least get some of the basics down so I could make his first birthday; I figured it couldn't be too hard. Because I stuck with a simple design it actually wasn't too hard.  The hardest part was getting the icing smooth since I'm a bit of perfectionist. (To be honest, getting the icing perfectly smooth is still my biggest issue!) 

    Not too bad, right?  Will I ever learn to calm down with the blue frosting?

    I finally got to make my daughter a proper cake for her 3rd birthday.  It was my first stacked tier cake.  This time I frosted it in purple.....not much better than blue!  :)  Whatever the color, I was pleased with the results and she LOVED it!

    Well, there you have it. Whether or not you cared, you now know what started my passion for cake decorating.  I owe it all to my precious kiddos!